How to make a folding display stand
By Shenzhen Topwon Group Co.,Ltd
Jul 20, 2026
As people’s living standards keep rising, they start to chase a unique lifestyle. But what does a unique lifestyle really mean? Today we will teach you to make all kinds of foldable display racks with creative ideas. These racks can store your special daily items. Almost everyone has leftover delivery cardboard boxes at home. We will introduce several foldable display racks with special structures to make storage more fun for you.
Part 1: Handmake a Simple Desk Storage Rack
This tiny desk storage rack matches every corner of your house perfectly.
We save many delivery boxes after online shopping. It feels wasteful to throw them away, yet empty boxes take up lots of space. At that time, my kid needed a storage rack, so we made one from cardboard to cut costs.
Materials You Need
Delivery cardboard in two thicknesses: around 0.6 cm and 0.2 cm; brown self-adhesive wallpaper; alcohol glue; two bronze metal drawer pulls with screws.
Step-by-Step Instructions
- Cut cardboard into target shapes according to your planned measurements. Follow the drawing to stick thick cardboard (0.6 cm + 0.2 cm) onto side panels. Leave gaps as wide as the shelf boards here. The middle shelf holds books, so we need better weight support. Glue two to three extra cardboard layers on the vertical bottom dividers and horizontal middle shelves. The full board thickness reaches about 1 cm.
- Glue boards in this order: left side panel → bottom base → right side panel → back panel. Attach two thin 0.2 cm cardboard strips on the base. Leave a 1 cm gap between the two strips. Slide vertical small dividers into this bottom gap to fix them. Spread glue into left and right gaps, then push horizontal shelves into the middle line slot and stick them tight.
- Install the top board. Cut small shelf boards to fit the empty middle width, then fasten them right on the middle line based on your storage needs. Cover all outer surfaces with decorative wallpaper. Secure drawer pulls tightly with tape. Your simple storage rack is finished! Isn’t it easy?
Part 2: Full Tutorial to Build a Foldable Market Stall Display Rack
It is not hard to build a cheap, convenient foldable rack for street markets. You only need basic handcraft skills: simple wood cutting and gluing. This easy guide uses common wood boards and basic cheap tools. The finished rack lets you show goods neatly on stalls, catch more customers’ eyes. The whole making process is much simpler than you think.
Click here if you want printable paper construction drawings for direct assembly.
Material List
Gather these supplies to build a light, strong, foldable stall rack: 1×4 inch pine planks, 1×10 inch pine planks, door hinges, wood screws, brad nails, sandpaper, wood glue, wood wax or wood paint (optional).
Wood Cutting Size Chart
Below are cutting measurements for every board of this rack. You can adjust sizes freely: add more layers, change shelf height, lengthen or shorten the whole frame. Resize width and height to fit your stall space, or build extra shelves for more goods. If you want an identical rack without extra adjustments, just cut boards by the listed sizes:
- 8 pine strips for the outer frame: 1×4 inch size, each 72 inches (around 183 cm) long
- 4 large pine shelf boards for goods: 1×10 inch size, each 6 feet (around 183 cm) long
- 16 supporting cross bars: 1×4 inch pine strips, each 17 inches (around 43 cm) long
Making Steps
Follow each step carefully. The finished rack stands steady without wobbling when you display market goods. This upgraded wooden rack is sturdier, easier to carry and far more durable.
- Cut all wood pieces. Slice every 1×4 pine plank following the size chart (or your custom measurements). Finish all cutting work first before assembly. This saves time and stops you from pausing mid-build to cut extra wood. Note on 1×10 planks: I use ready-cut 6-foot planks. Their length works perfectly as shelves with no extra cuts. You may splice short boards or use longer/shorter planks based on your needs.
- Sand all wood. Rub sandpaper gently over every surface and edge of cut boards. Smooth wood makes assembly simpler. Waxing or painting later will also create a nicer look.
- Measure and mark lines. Grab one left frame plank. Draw three horizontal lines starting from its bottom: at 26 inches, 50 inches and 66 inches. Draw matching lines on the right frame plank. Use a square ruler to add vertical lines at each mark. Make six marking points line up exactly on both side frames. This prevents the rack from tilting during assembly.
- Build one single side frame. Place two marked side planks parallel with a 10-inch gap between them. Lay four supporting cross bars in position without nailing first. Put the bottom bar down, wedge small wood blocks on both ends to align it with side frames. Line the second bar with the 26-inch mark, then place the rest two bars at the 50-inch and 66-inch marks. Fasten cross bars to side frames. Use 1.25-inch brad nails, fine staples or wood screws. First hammer one nail on the left to hold the bar steady, then add four or five nails on the right for strength. Fill missing nails on the left side last. Repeat this method for all horizontal bars. Do not overfill nails. Leave small empty spaces along top and bottom cross bar edges to install hinge screws later.
- Repeat Step 3 and Step 4 to make three more identical empty side frames.
- Mount hinges. Connect four side frames with hinges to create a foldable goods rack. Place two frames side by side with a tiny gap no wider than 1/8 inch. This gap lets the rack fold and unfold smoothly. I pick 3-inch matte black silent door hinges. They bear heavy weight well. Thin cheap hinges turn loose and make the whole rack shake. Door hinges have soft close buffer effects and greatly improve rack stability after installation. Install hinges at the top and bottom of each side frame. Align the hinge rotating axis right over the gap between two boards. Do NOT install hinges backwards—otherwise the rack cannot fold inward flat. After checking hinge direction, tighten wood screws shorter than 1 inch to lock top and bottom hinges in place. Skip full six screw holes if brad nails block holes; the rack’s own weight provides enough stability without every screw hole filled. Test smooth folding after mounting hinges. Attach hinges to the other two frame pairs using the same method.
- Test-fit shelf boards. Unfold two hinge-linked frames into a stable diagonal support shape. Slide four shelf boards into slots on cross bars. The main body of your display rack is complete. Click here if you need printable construction blueprints.
- Wax or paint wood (optional). Add paint or wax to match your stall style if you want. I skip paint and wax to keep natural pine color. This cuts production time and costs. Raw wood looks warm and helps attract buyers. You can paint or modify the rack into any style you love.
- Fold and store the rack. Take out all shelf boards after use. Push two side frames inward to fold the whole rack flat. It travels easily and unfolds quickly when you need it again.
Your cheap, portable DIY foldable market display rack is fully finished. It works great for trade fairs and all temporary display spots. Hope this simple rack helps you sell lots of goods and meet many fellow sellers!
Part 3: DIY Foldable Corrugated Cardboard Display Rack (Hook Style for Markets & Street Stalls)
1. Material Prep (Low Cost, Easy to Buy Locally)
- Main material: E-flute or B-flute hard corrugated cardboard (3–5 mm thick). Choose B-flute cardboard for better load-bearing and sturdiness.
- Auxiliary supplies: Wide clear packing tape, white wood glue, utility knife, measuring tape or steel ruler, pencil, hole puncher, metal or plastic display hooks.
- Tools needed: Square ruler, cutting mat, heavy weights (press glued joints flat to stop separated layers before glue fully dries).
2. Two Popular Foldable Structures (No Glue Needed for Disassembly; Flat Shape Saves Shipping Space)
Plan 1: One-Piece Foldable Hook Display Rack (Simplest Design for Small Jewelry & Stationery)
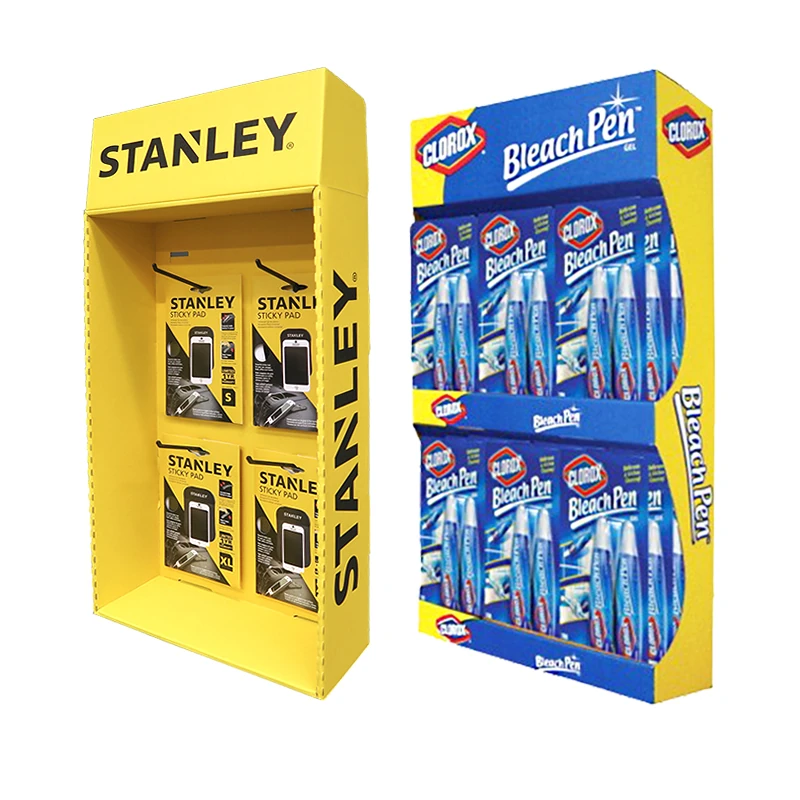
Official English name: cardboard hook display rack / peg display stand Standard market stall reference size: Full open size: 60 cm height × 40 cm width × 12 cm depth Folded storage size: only 12 cm thick, space-saving. Making steps:
- Cut one full large cardboard sheet: 120 cm long × 60 cm tall.
- Crease the middle line. Scratch a deep fold mark at the 60 cm midpoint with the back of a steel ruler. The board folds evenly into two halves.
- Mark horizontal creases for shelf supports. Draw a horizontal fold line every 18 cm upward from the cardboard bottom. You get three hanging layers for goods.
- Cut triangle locking feet on left and right edges. These tabs fold inside when stored. Lock opposite triangle tabs together to hold the rack upright without tipping when open.
- Punch holes and install hooks. Drill evenly spaced round holes across each horizontal layer. Fit prepared plastic hooks to hang small jewelry and tiny merchandise.
- Reinforce weak spots. Cover all fold lines and locking tab joints with packing tape. Tape stops cardboard cracks from repeated folding.
Plan 2: Split Interlocking Foldable Display Rack (Higher Load Capacity for Boxed Goods)
This multi-layer rack separates fully and folds into a tiny flat piece. It fits cross-border sales and courier delivery perfectly.
- Cut three different cardboard parts:
- Two vertical back panels: 60 cm long × 15 cm wide, with fixed locking slots cut on side edges
- Multi-layer hanging cross boards: 40 cm long × 12 cm wide, with small locking tabs on both ends
- Two bottom supporting boards that fold inward for storage
- Make fold creases: Slice only the top paper layer on all folding areas with a knife. Do NOT cut through the whole cardboard sheet. This lets the board bend freely back and forth.
- Assembly guide: Unfold for use – slide cross hanging boards into slots on vertical back panels, pull out bottom supports, and the rack stands independently. Pack for shipping – remove middle cross shelves, fold two back panels toward each other, tuck support boards flat against back panels, and compress the whole rack into one thin flat sheet.
3. Universal Key Production Steps
- Draw layout lines. Mark all fold, hole and locking tab positions on cardboard following blueprint measurements. Confirm rack height and layer count for stall use. Keep all dimensions identical to drawings for smooth assembly.
- Create clean fold lines (critical for easy folding). Line a steel ruler over drawn marks. Scratch only the top cardboard layer with a utility knife. Never cut through inner corrugation and bottom paper. The board bends smoothly and resists breakage after repeated folds.
- Cut locking tabs and slots. Interlock shelves and vertical boards via matching tabs and slots without glue. Take the rack apart or fold it anytime. Make tabs 2–3 cm wide. Leave an extra 0.3 cm gap in slots for easy sliding and connecting.
- Punch holes for hooks (peg display function). Drill 5 mm round holes every 5–8 cm on each horizontal shelf. Clip plastic hooks into holes to hang light small parts.
- Reinforce and weatherproof. Cover all folded edges and weight-bearing areas with clear tape. Add matte self-adhesive film over the whole board if you use the rack outdoors long-term. The film stops cardboard softening and damage from moisture.
- Test folding and load strength. Shake the assembled rack gently to check stability. Widen and thicken bottom support boards if the rack tips easily. Run repeated folding tests. Make sure the rack presses totally flat after folding, and hooks do not scratch cardboard surfaces.
4. Practical Optimization Tips
- Lightweight shipping: All pieces separate completely and fold ultra-thin. This greatly cuts courier fees and fits OEM foreign trade orders well.
- Custom printing: Print store logos, discount slogans and text on corrugated cardboard before cutting.
- Boost weight support: Glue two cardboard sheets together to make reinforced pegboard backs. Widen and thicken bottom supports to hold heavier boxed products.
- Fast assembly & disassembly: No glue used anywhere. Finish setup in five minutes for trade shows or pop-up stalls. Fold flat instantly when closing your stall—operations stay quick and simple.
5. Standard Finished Size Template (Direct Cutting Reference)
- Folded shipping size: 60 × 40 × 3 cm (totally flat, easy to pack into cartons for delivery)
- Assembled working size: 40 cm wide / 60 cm tall / 12 cm deep
- Layer count: three hook-equipped shelves, ideal for small jewelry, mini hardware parts and beauty samples.

Cardboard display racks gain wide acceptance across all industries. The sector has grown steadily over ten years, with many cardboard display manufacturers opening nationwide. Structural design forms the core soul of cardboard displays. Shapes vary endlessly, yet building sturdy load-bearing structures with paper creates major technical challenges. High-quality cardboard racks rely on skilled structural designers and professional design software, which doubles your work efficiency.
If you plan mass production of foldable corrugated display racks, Topwon offers professional manufacturing services.
Previous Article
Core Values and Comprehensive Advantages of Floor Display Companies in Offline Retail
Next Article
The Ultimate Guide to Rigid Poster Board Materials for Cosmetic Salon Displays


Trusted by These Featured Clients